上次分享了如何透過 Spring CLI 建立 Hello World Application,這邊文章將延續上次的文章繼續產生第一個 endpoint 和產生 Swagger 頁面
建立第一個 Endpoints
建立一個新的 package contoller 並建立 statusController.java
 1package com.example.springboot_demo.contoller;
 2
 3import org.springframework.web.bind.annotation.GetMapping;
 4import org.springframework.web.bind.annotation.RestController;
 5
 6
 7@RestController //1
 8public class statusController {
 9
10    @GetMapping("/status") //2
11    public String  status() {
12        return "ok";
13    }
14}
備註1 : RestController 等於 @Controller + @ResponseBody,
- ResponseBody: Spring 會自動幫你把 Response 轉換成 Json 格式
- Controller: 告訴 Spring 這是一個 request 進入點的 Class ,負責調度請求(RequestDispatcher)
備註2 : GetMapping 是 RequestMapping 的 alias 只是一種 Method 指定了是 Http Get Method, RequestMapping 告訴 SpringBoot endpoint 設定,如 path 、header 等等,後面會提到更多,目前先知道當打 /status 這個 endpoint 時,SpringBoot 會找到這個函式並執行。
測試
現在將 Web Server 啟動,並打 status endpoint,我們會得到我們剛剛所寫的 “OK”
1$ curl http:/127.0.0.1:8080/status
2ok
建立 Swagger UI
在 pom.xml 的 dependencies 中加入 pringdoc-openapi-ui 的 dependency
1<!-- Swagger UI -->
2<dependency>
3    <groupId>org.springdoc</groupId>
4    <artifactId>springdoc-openapi-ui</artifactId>
5    <version>1.6.9</version>
6</dependency>
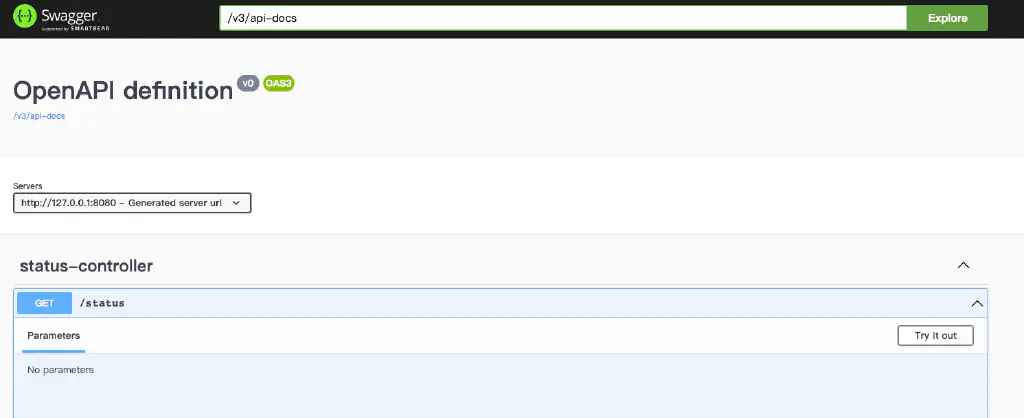
這時候將 Application 執行起來,就可以在 /swagger-ui.html 的 path 看到 Swagger UI。
Swagger UI 可以看到現在 Application Endpoint 資訊,例如這個 endpoint 是什麼 method、需要帶什麼參數,並且會返回樣的資料結構等等。當然這需要一些額外的 Coding 提供資訊,所以這個之後找時間會再細講
這邊順便介紹一下 application.properties 這個文件,是用來設定 Spring Boot Application 的檔案
例如我想要自定義剛剛安裝 Swagger 預設的 URL,可以在 application.properties 裡面加以下內容
1# swagger-ui custom path
2springdoc.swagger-ui.path=/swagger
更多這可以設定什麼可以看官方文件


評論